- Browse Lighting By:
How To Install A Wind Baffle
October 1st, 2015
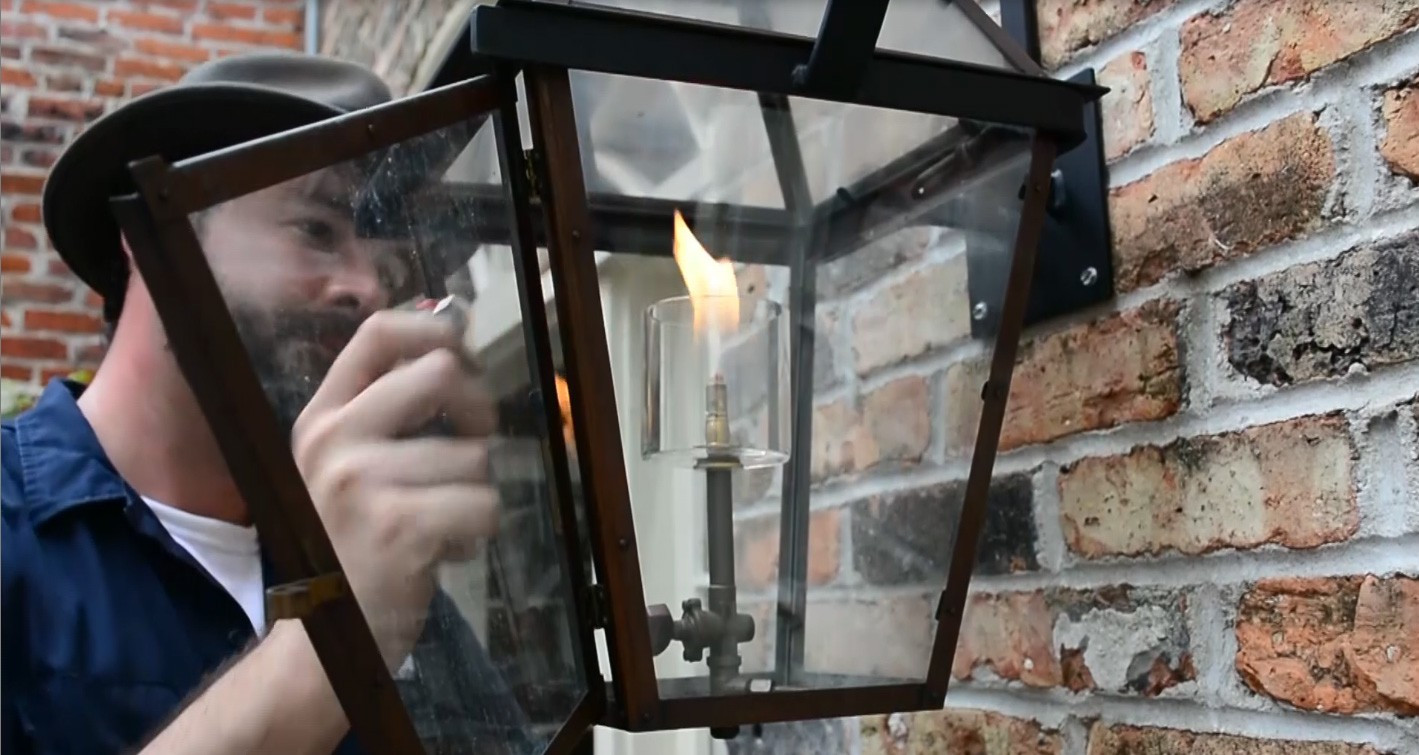
Bevolo fixtures are designed to hold up to normal wind conditions, but in areas with excessive winds, such as coastal environments, wide open plains, and high altitudes, further measures can be taken to ensure that the flame will not blow out.
WATCH OUR QUICK INSTALLATION VIDEO
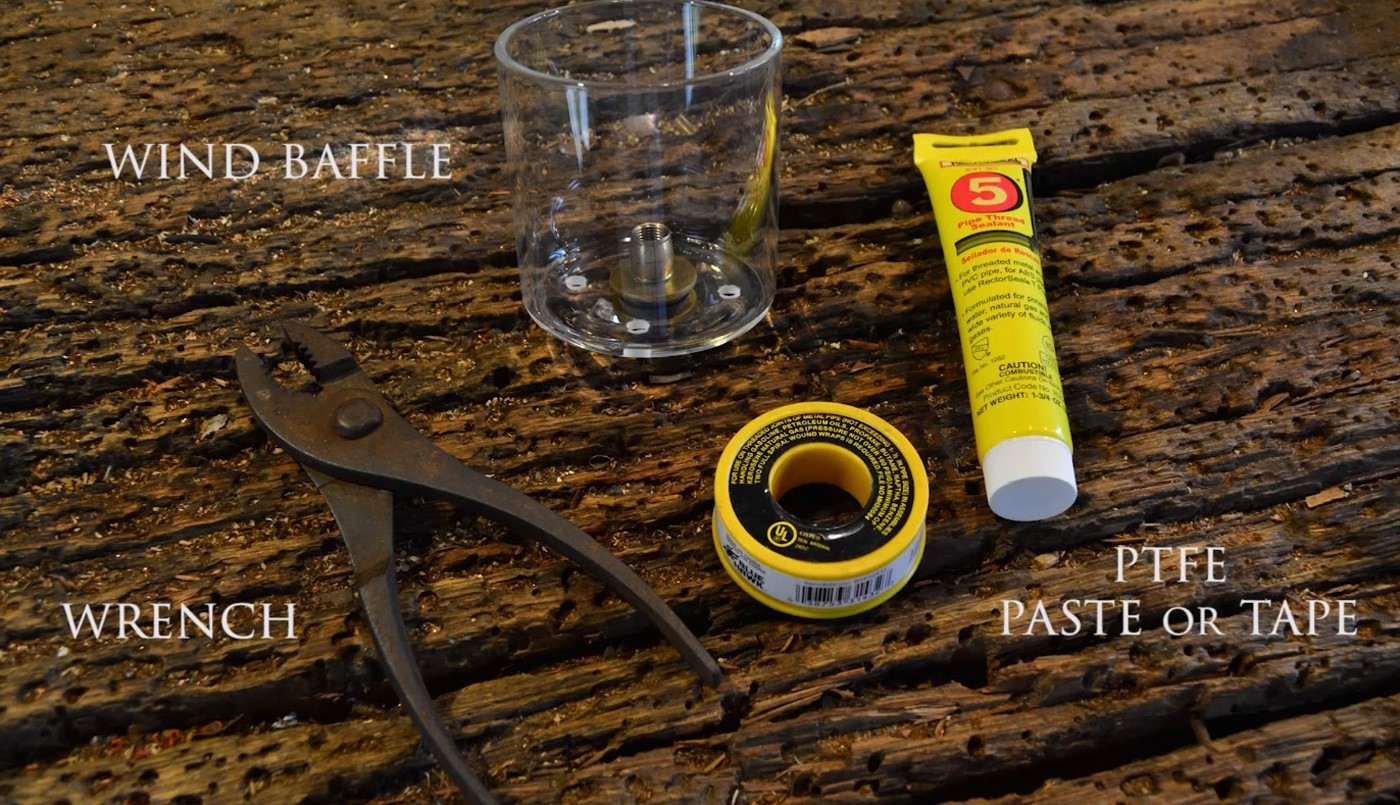
To install, you'll need a few simple tools in addition to the supplied Wind Baffle Kit.
- Wrenches
- PTF Paste or Tape

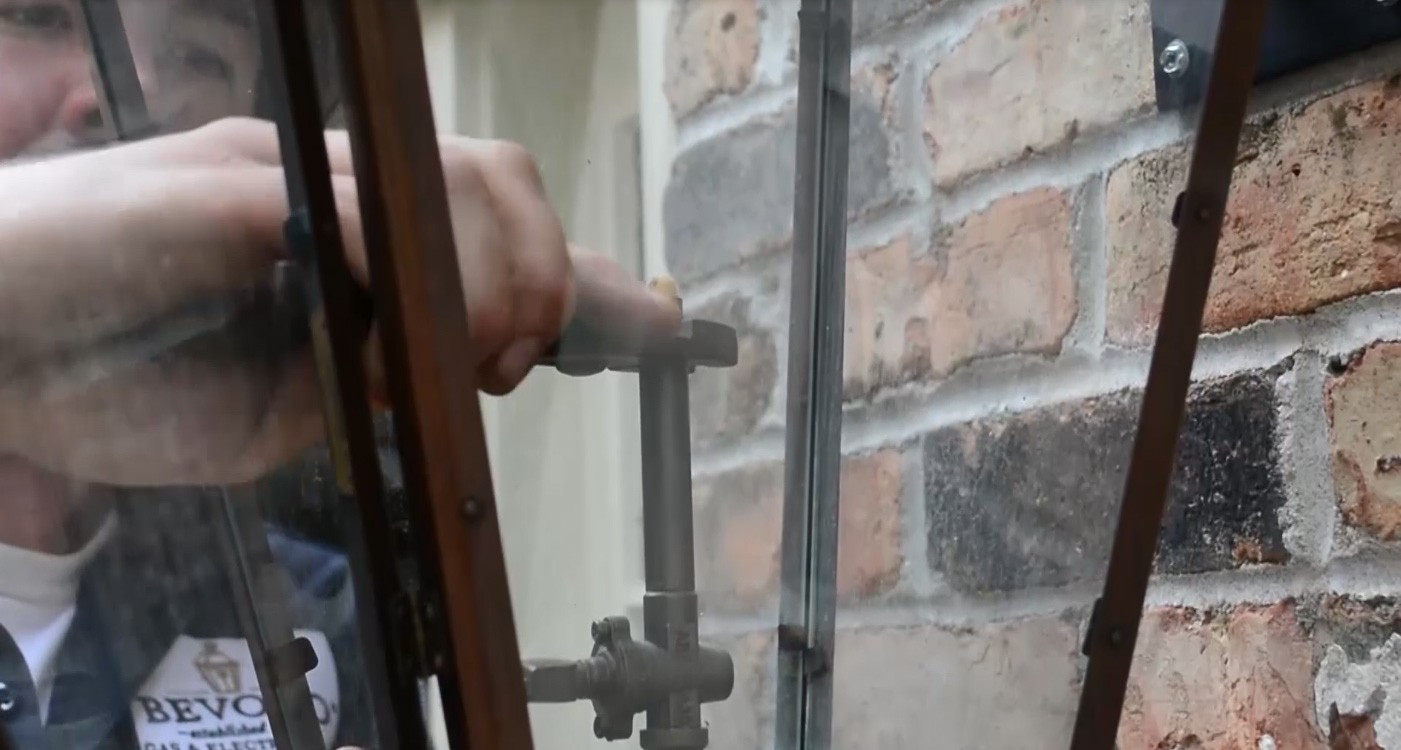
1. Turn the gas valve to the off position and allow the burner assembly to cool before handling.
2. Next, take a 7/16' wrench and carefully unscrew the porcelain burner tip, while stabilizing the gas jet assembly. Set this aside for later use.
3. Take the Bevolo supplied Wind Baffle and unscrew the plastic black cap to expose the threads on the bottom of the wind baffle. Then take the PTF paste and dab a small amount on the threads before screwing onto the gas jet assembly.
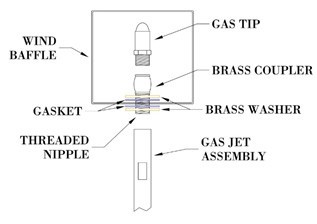
- Note the gasket and washer relationship, as illustrated on the installation instructions
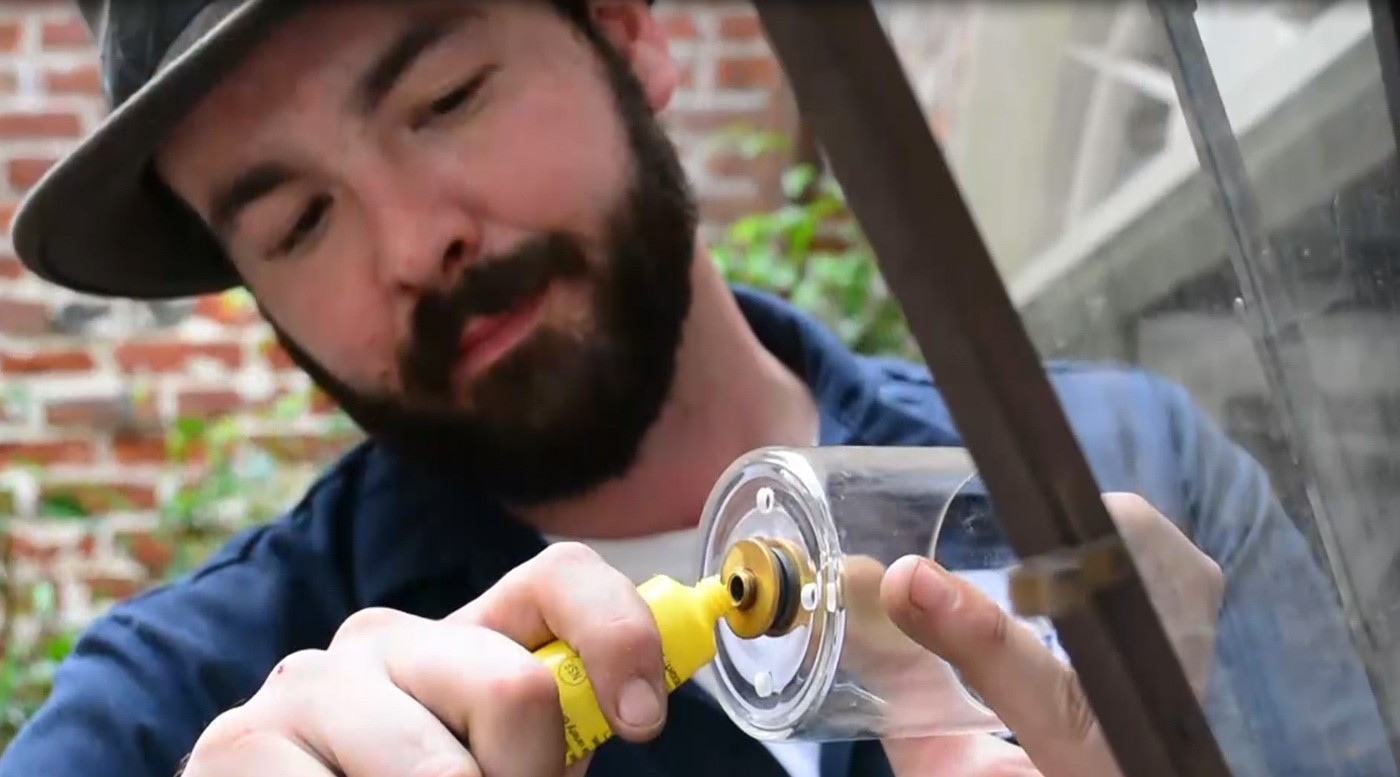
4. Now it's time to reinstall the Bevolo burner tip. Prep the burner tip with a small dab of paste and screw it into the brass coupler supplied with the Wind Baffle kit.
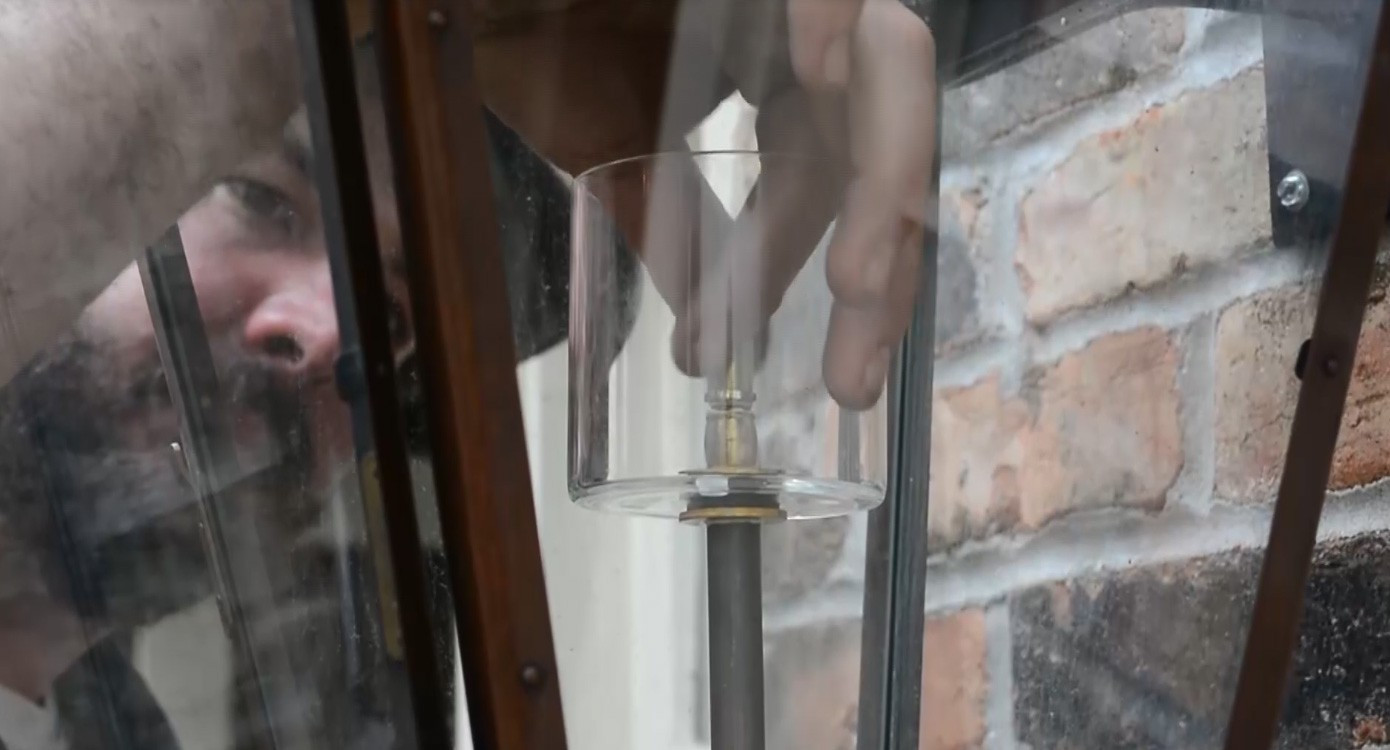
5. Then tighten the burner tip with the wrench. Be careful not to overtighten. Make sure that the opening in the tip sits parallel with the front of the fixture in order to create our signature batwing flame.
6. It's time to relight the lantern. Return gas valve to the open position and relight burner. Adjust the flame to the desired height. We recommend a 1, -2.5 flame height dependent on the scale of the lantern. If you notice soot build up overtime, lower the flame height. To clean, simply wipe away with a damp cloth.